Friday, March 30, 2012

Camper than a row of tents.....

30/03/2012
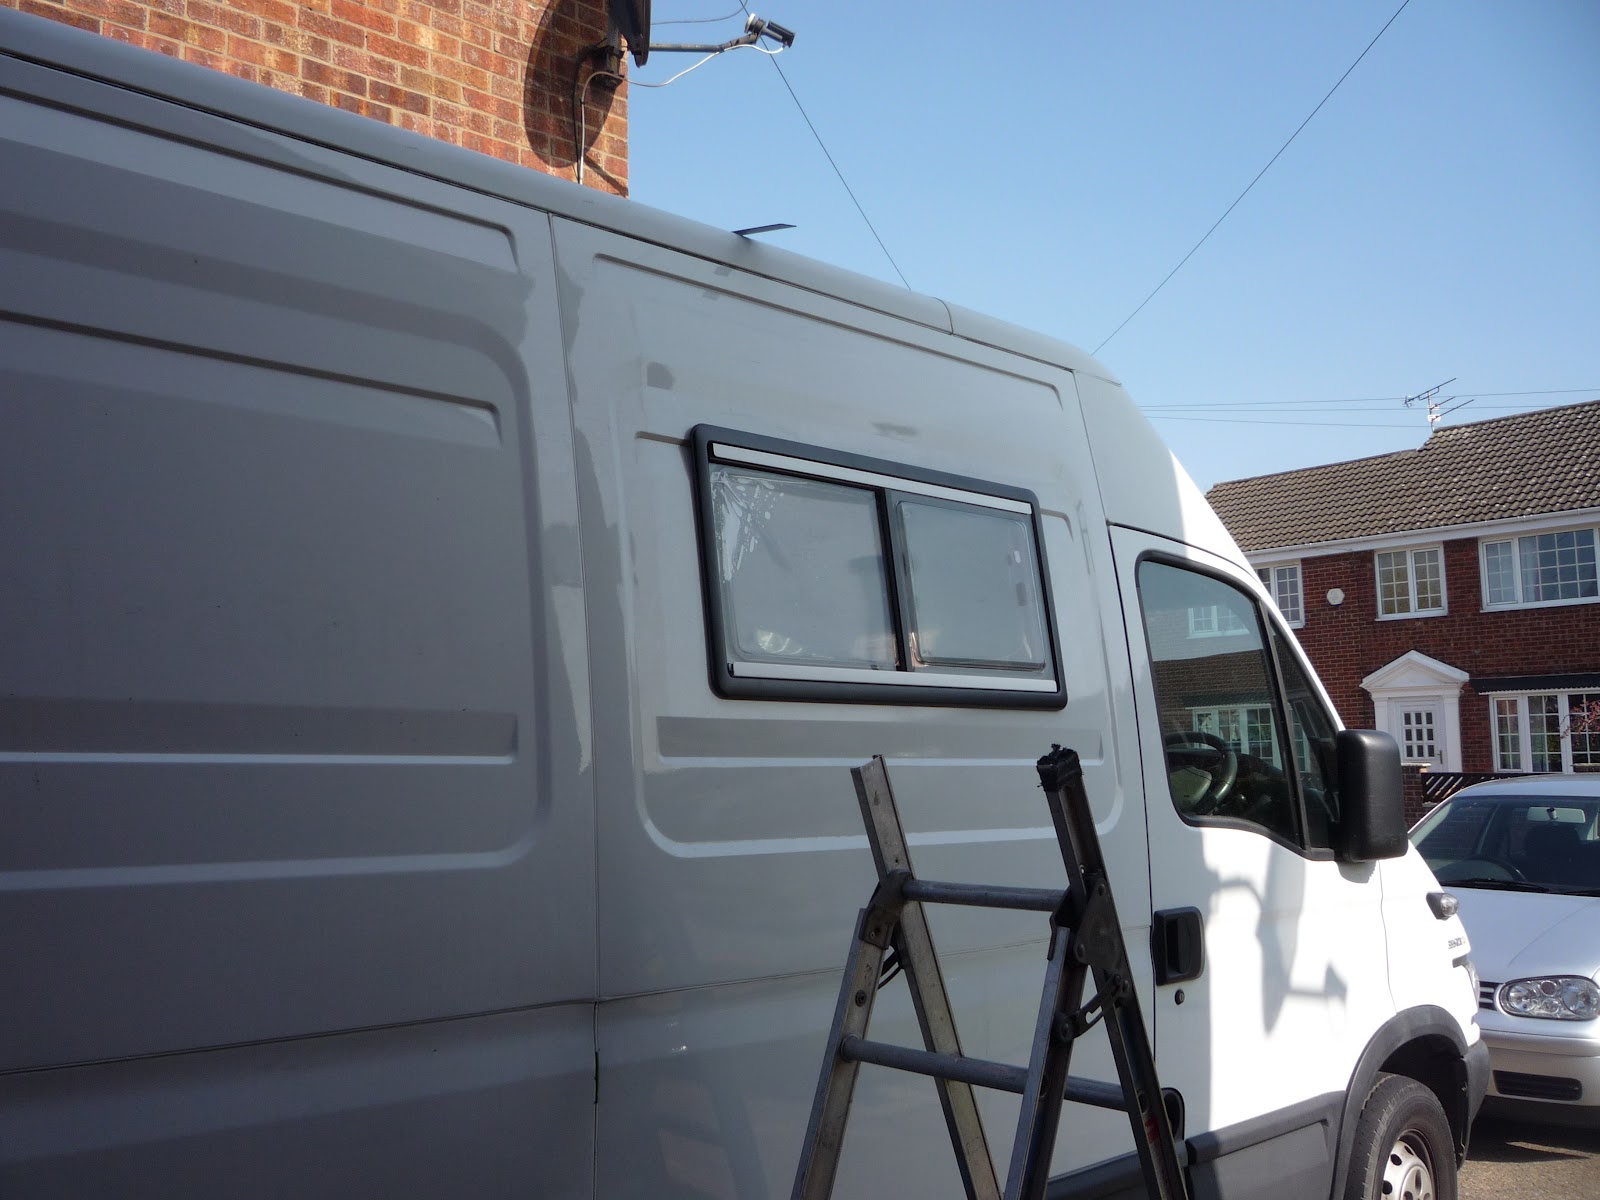
A couple of days catch up – I finished the windows, including mastic on the outer frame to seal.  I might run a bead of black sikaflex around the frame to make doubly sure.  Quite a lot of time was spent getting the battens cut just right – see the pic below.


Inner batten, curved to shape of the van, otherwise when you tighten the windows up, the van panel is pulled flat and doesn’t look too great.


Blue mastic on outer window frame, comes in 40mm width, cut down using scissors, great fun 

Reveal starting to be built….
Wall insulation. 
I finally made some decisions on the wall and roof insulation.  Initially I was going to use expanding foam throughout.  However, I couldn’t get my head around how to ensure even coverage, and also wasn’t sure about the coverage I would get from the kits, so could have cost £400.  So instead I will use a combination of fire proof expanding foam (dispensed from cans using a metal gun, much easier to handle than the 2 part kit stuff that can be costly if the mix is wrong) and celotex.  Expanding foam will be pumped in behind the 25mm celotex to fill the void, provide a moisture barrier, and act as an adhesive to keep the celotex in position.  6mm ply will be laid over this to finish the wall.  The ceiling will be done the same.  I think I can also get away without using many battens this way as well, and can attack the job in sections rather than all in one.
In addition, I cut a couple of pieces of wood to mock up the base of the rear bunk.  I plan to get some angled steel in place of the wood that will be bolted to the horizontal ribs.  Probably also use some box section steel lengthways, with several sections of ply acting as the bed base.  The bed will measure around 6ft across the diagonal if its 900mm wide (standard single width as I want to use an Ikea slatted bed base for comfort)
The 2 wooden slats are where the rear bunk bed base will be. 
Tomorrow will be a general tidy up and more internal furniture planning.

Wednesday, March 28, 2012

Windows, 2012.

Well done for sticking with this :)
Today I got my carpentry tools stash:

Some tools today.

Most of which I didn’t need as it was rooflights and cutting windows day.
After much thinking, I decided not to use the other big (40cm) vent – but to install the small turbo (28cm with electric fan) on the roof where there is a flat section.  The hole vent fit in this area without any packing above the roof – so in theory water tightness should be more easily achieved.

Turbo rooflight with fan.  Test fitting after cutting the hole. 

Completely installed.  I used 40mm blue mastic and sikaflex on the outside to seal it.  Will give it the hose pipe test tomorrow…..

Front roof light also finished.  I filled all the gaps on the ouside with hardwood and mastic.  Again yet to be tested for waterproofness….

Having pretty much finished the rooflights, it was time to do the windows….

Man at work, marking out the window.  Just to prove it is actually me doing this….

3 cuts in.  I drilled holes at the corners to allow the jigsaw blade to get started.  At this point I applied more duck tape to stop the panel flapping about, before starting the 4th and final cut.

Holey Moley

Window test fitting.  Pretty straight, I think one of the corners needs grinding slightly to drop the front bottom corner a touch.  The idea is that the top of the silver line aligns with the top of the recess (you can see the shadow formed by that above)

Sikaflex, clamps etc. etc. 

The windows came supplied with battens, but they were 25mm (which according to the seitz manual, is the correct size for a 1mm wall – seitz windows are made for 26mm thick walls.  However, the actual walls of the megabus are going to be something like 50mm thick.  So, I am going to made a window reveal somehow.  Step one for this was to cut the battens down to 21mm, which, when small width of 4mm play is added, gets me back to 25mm.  The window will be inset 25mm from the main ply wall, the reveal being formed by the 25mm section butting up against a 50mm section.  Or that’s the plan anyway….

Secure for the night…. You can also see the navy seat covers fitted.

Tomorrow I’ll endeavour to get the window in the sliding door.  Only got half a day tomorrow as another bike ride is arranged for the afternoon.  Should be enough time to get the hole cut and battens sized, ready for finishing on Thursday….

Tuesday, March 27, 2012

Theres a hole in my roof, dear Liza....

27/03/2012
So, a couple of days to catch up with,  its been a busy couple.  Managed around 8 hours work on the megabus, inbetween signing on and bike riding and what not J
Yesterday went to get some more wood from Tommy.  The van is noticeably quieter even with only one part of the floor finished, which is good.  Its possible to hear the stereo, so the other pair of speakers I have can now go into the rear, rather than the cab roof as previously planned.
I also managed to get the floor almost finished.  I put a 4” wide channel near the wheel arches for cables / pipes between the sides of the van.  Shaun next door has given me some flexible conduit that will be under the floor to carry the cables safely.  I have not decided if I should put a removable lid on the channel or not.  At the moment the top layer of ply is cut to shape in one big piece, but it would be easy enough to cut a piece out for a lid.
Remaining floor being built, with the channel for routing cables and pipes etc.  Note also makers mark.
I still have to cut the celotex and make some finishing battens (spot where they should go in the photo above) but the floor is now usable.
 
Usable floor.  Shauns ladders.
I also removed an anti-drumming rib, in preparation for the window install.
Today was the roof light install.  I measured about 10 times, and decided the best place for it (a fiamma vent 40) was where the roof rib is in the picture above.  So first job was to remove that.  The dremel made short work of cutting through it, but the adhesive that is was stuck to the roof with was another matter.  Anyhow I marked out on the roof where the hole was to go, drawn on duck tape to protect the paint, and got the jigsaw to work.  Sadly snapped a blade when it hit the rib (that was still attached with adhesive).  Plan B resorted to using the dremel to finish off.
Roof mounted anti-drum rib.  Stuck.
Sky as visible through hole in roof.
As you can see in the pictures, the roof isn’t flat, so I had to build it up and fill with 10mm thick strips of wood (all cut by hand with a jigsaw, still waiting for a tenon saw)
Some Tea.  Clamps holding frame in place.  You can see some 10mm strips here (they also need to go on the outside, which no doubt will be fun to make water tight…..)
Forest of clamps…..Holding in place the frame while the sikaflex dries.

 
A hole from above.

That was it for today (the windows arrived, as did the lpg gas tank – which is huge!).  Followed this with a 25 mile bike ride J
Tomorrow is more roof lights, and starting on the windows.

Sunday, March 25, 2012

more floor.....

Today I made more progress on the floor (after a top quality bike ride in the morning) – the first section (behind the cab) is finished, and 12mm ply is cut for the garage.

I realised I didn’t need to insulate the garage area, so that meant less work – only requiring to cut some 12mm to shape. 
The garage are is going to be 1700mm deep (from the back door) – this gives space for bikes in bags, bikes lengthways with their front wheel off, and possibly depending on the size of the bike, lengthways with front wheel turned nearly 90 degrees.

So, I have 4mm ply lined upto the 1700mm mark, then 12mm back from that.  I need some more battens and a sheet of celotex to complete the living area floor, which I will get tomorrow.

I’ll also put in a tunnel for cables across the van near the wheel arches.  I guess this will need to have a removable lid so that you can unscrew and get access later.  Not sure exactly how this will work yet…..

First sheet of celotex cut to shape and installed.  Todays top tip is use a bread knife to cut celotex, its perfect.

Now two….

Finally the 3rd, note handbrake area, and pieces to fill the void near the step….

12mm ply cut to shape and screwed down – notice marks on the batten to show where the supports are underneath

  Garage area.  All the rough edges (side step, rear step) will be covered with aluminium edging.  Hoping to also cover the garage with 5 bar aluminium treadplate so its hardwearing (however its expensive)

Next week I hope to get the windows ordered, and windows and skylights installed (I have the skylights already, just need to figure out where in the roof they can go – having problems finding a suitable space for the one above the bathroom) .  Good weather means it is an ideal time to do this.

However, before I cut holes for the windows, I need to figure out how high the bed base (with seat and back cushions) will be, since the window will need to be above this ideally.  From my mums camper, the seat base is around 14” high (with 5” of cushion).

The plan is to have a seat box that pull out into a double bed, so around 1200mm wide (sorry for mixing imperial and metric measurements, but I was born in 1971 J) – so the seat base needs to “house” (as seat cushions) 1200mm worth of foam for the bed “mattress”.  Not figured out how yet ….

Friday, March 23, 2012

megabus progress....

Hello, its been a busy week:

1)      Removed passenger twin bench seat and replaced with single (to make van a walkthrough)

2)      Fitted cruise control – essential for the European motorways

 
3)      Fitted new stereo and speakers – still work to do here to get the sounds good.  The standard speaker position is terrible (4”x6” ovals pointing at the floor, replaced with jbls) - I’ll be putting an additional set of speakers in the cab roof (after replacing the plastic shelf with wood) and a pair of speakers in the back.  Stereo is good, it’s a mechless one (that is, no CD player) with iPod direct control and a SD card slot.  CDs are dead and good riddance.  I have used an amount of Silent Coat sound deadening (like dynamat) in and around the cab with a view to quietening it down.  The noise situation will improve as the back is built out, especially once there is insulation and ply covering the whole rear end.

4)      Cleaned and prepped the floor.  All small rust spots removed back to clean metal with a dremel (dremels are awesome) and painted with nice primer.

5)      Painted the floor with Plastidip (www.plastidip.co.uk) – a rubberised floor covering, should protect and also dampen noise.  Not sure I’d use this again – its expensive, probably just use hammerite next time.
6)  Ordered an LPG kit (60l tank, about 25kg of gas, equivalent to 2 and a bit 11kg gas bottles) and a split water tank (106l fresh, 94l waste) - I'll expand on these more later, but the idea is that the van is self-sufficient without refills of gas or water for a good few days (hopefully more like in a week)


And that brings us to today, I visited Tommy at Howarths Timber in Wakefield and purchased 4 sheets of 4mm ply, 4 sheets of 12mm ply and also some 2”x1” battening.  The battening will be used on the floor to provide a frame for the celotex insulation. 


Loaded up at Howarth Timber.  Cheers Tommy.  Nice brown plastidip floor.

The floor is built thusly:
1)      Layer of 4mm ply (8’x4’ sheets, cut down to Van Width x4’, so 4 sheets required as load area is 4.5m (!) long)
2)      Layer of 25mm celotex insulation
3)      Layer of 12mm ply (same cut as 4mm)

The plan is then to cover the floor with some hard wearing vinyl type flooring (probably Tarket Spectrum).  Overall I’ll lose about 45mm of height, but that should be fine with around 1900mm available.

So, here is progress on the floor….

Little stacks of wood sikaflex’d in position where a lack of rib would leave a weak spot….
The ever present sikaflex gun…
Starting to take shape….the voids will be filled with celotex then covered with the 12mm ply….

And so it continues, hoping to fit the gas bottle, batten the walls in preparation for expanding foam insulation and complete as much of the floor as I can next week......wish me luck....

Friday, March 16, 2012

new project

well hello!
its been a while - since the last post I have lived in Prague for 12 months.  It was mostly shite.
However, it gave me enough cash to take some time off, and start a new project.
The project is 'megadas nutbus', more to follow......